Adding Legs to a Dresser

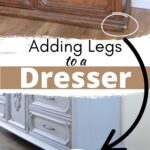

Is your furniture too short? Adding legs to a dresser not only adds height, it gives a modern touch to your old furniture. So learn how to EASILY add legs to dressers, my favorite place to get legs for a dresser, and how to quickly modify your dresser so you can put those legs on.
On top of these DIY dresser makeover ideas, adding legs to your dresser can completely transform the look of your furniture. Keep reading for step by step instructions on how to add dresser legs and some tips for choosing the perfect legs for your dresser.

This definitely isn’t our first rodeo of adding legs to a dresser. Actually, over the years, we have added legs (or furniture feet) to quite a few different pieces of furniture. And over the years we have used so many different techniques. If you go wayyyy back to the beginning, I wrote a tutorial on how to add legs to nightstands, but it definitely was not the easy way.

We spent hours trying to measure everything just right, we used old legs from another piece of furniture, and we really didn’t have many tools. We were just getting started. Then we got a little smarter and learned a different method of adding legs to a nightstand. This way is so much easier, but you still have to measure a lot and buy extra wood.
*Update* – Since this makeover, I have also written a post about how to upcycle a desk into a pair of nightstands where we added legs to the nightstands because two legs were missing.
This was a really fun makeover that pushed me further into building and repurposing furniture!
Supplies Used To Add Legs to Furniture
As an Amazon Associate, I earn from qualifying purchases. I also may earn from other qualifying purchases with other companies or get free product to review and use. All opinions are my own.
- Dremel Multi – Max
- Eye Protection
- Legs or Feet
- Furniture Leg Plates
- Drill with a Small Drill Bit (smaller than the screws that come with the leg plates)
- Paint if you decide to paint your furniture too!
The Easy Way of Adding Legs to a Dresser
We heard of using a multi-functional tool to cut wood furniture in half to make it into something else. I’m sold! I mean, how cool is this farmhouse bench makeover?? And she used a multi-functional tool to cut up an old TV stand and created two different things.
So I looked into this tool and found out there are so many things that a homeowner / DIYER can do with a multi-functional tool!
Uses of Multi-Functional Tool
After searching around for a great multi-functional tool, I landed on this specific one, the Dremel Multi-max. Why? Well, Dremel is a great brand. They have years behind them, and the reviews were great! I also really liked how easy it is to change the accessories with the Quick Lock.
No one else had this super easy feature! So instead of quick and easy, I would have to use a hex key to change out the accessories. No thank you. I want it to be super simple and easy so I’ll actually want to use it!
I also really liked how many accessories came with it; 4 cutting blades:
- wood
- metal and wood
- wood and drywall
- drywall jab saw
- a grout removal blade
- AND a sanding pad with 21 sheets of sandpaper that velcro onto the pad.
So basically it’s a sander and wood, metal, drywall, and grout cutting machine, all in one. Oh, and it comes with a little bag to put everything in too which my OCD husband loves.
I reached out to Dremel and they sent one over for this project!
Here’s the complete truth, before we even were able to get around to this dresser, we used this Dremel twice. And since this project we have used it countless times. From using it as a sander to get into corners and tight spaces, to cutting random wood for random projects around the house.
I’ve been blown away by how many times I have used it in just a month or two.
How to Remove Old “Legs”
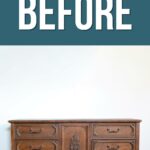
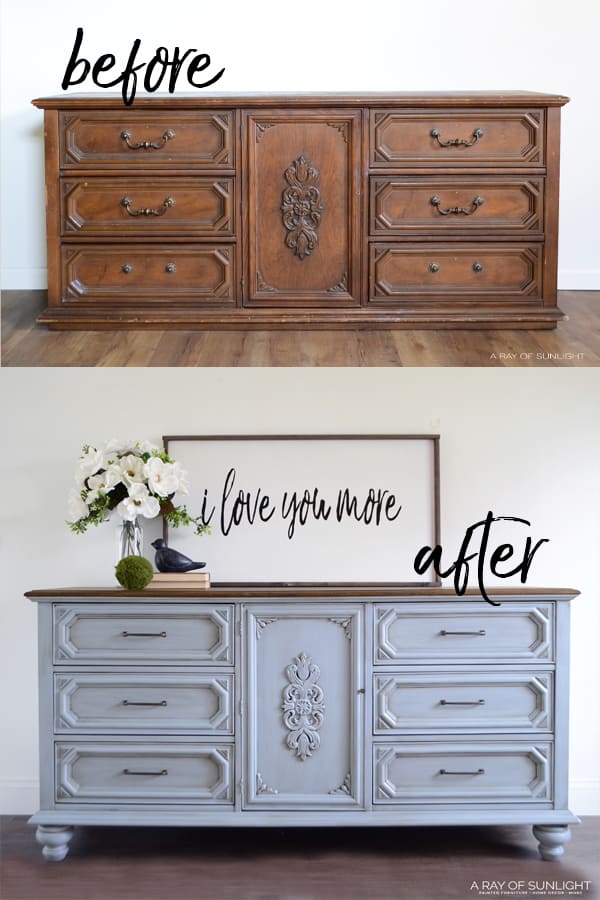
If you notice, this dresser has a skirt on the bottom that acts as its legs to make the dresser taller. The skirt really outdates the piece though, so the first step is to get rid of it.
Now, I thought I might take a jigsaw or circular saw to it, but I’ve done that in the past, and it really isn’t as easy as it sounds. Neither of those saws really cut straight, and you can’t just rely on keeping it flush against the other wood because they are so strong that they will cut through what you’re trying to keep it flush up against.
That’s why we got this multi-functional tool!
Another reason we wanted to take the skirting/bottom off, is so we would have a good place to screw the leg plates into. In the past, we’ve added plywood over the skirt to make a box, but that takes extra material which means more money and time. And it just doesn’t look as clean-cut!
Get Our Secrets!
Grab this super convenient How to Repair Furniture Ebook with all of our secrets on how to repair furniture for only $14.
You can print it out and have instant access whenever you come across damaged furniture, and know exactly how to fix it!
Click on the picture of the book to purchase!

Look to see if any screws are holding the bottom on. We started out by flipping over the dresser, so it was sitting on its top. Then we took a closer look at what we would need to do to take off the skirt.
On this particular dresser, and on a lot of dressers, the front skirt was screwed on, but the side skirts were actually part of the sides of the dresser.
So we removed the screws from the front skirt and removed the screws from any of the wood braces that we saw. These are usually in the corners of the skirts, and maybe in the middle back of the dresser.
Once all the screws were removed, the front skirt easily came right off. There were two braces in the back that were nailed on as well, so we used a hammer to pound those off.
How to Cut Off Bottom of Dresser
Now we just needed to get rid of the side skirts. Here’s where the Dremel made its debut!
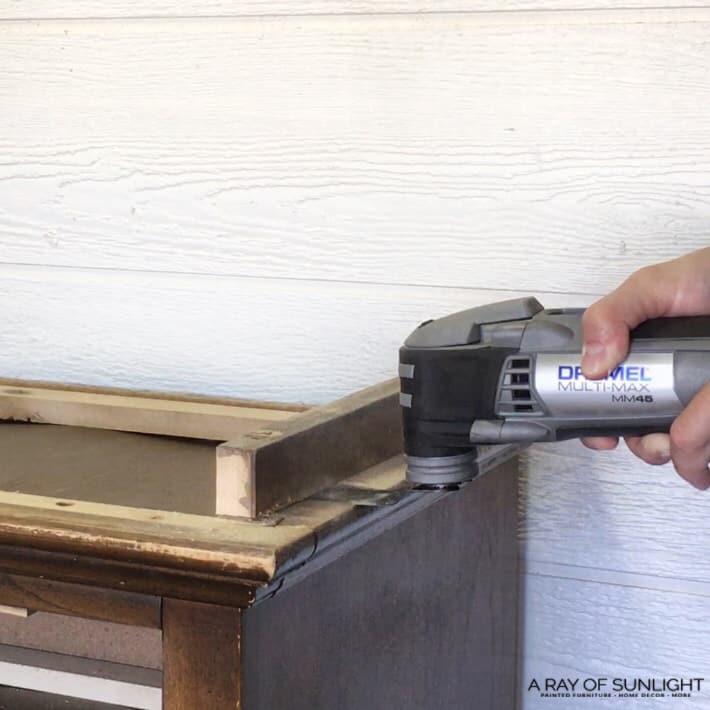
We put on a wood blade, locked it in place, turned the Dremel on, and then cut the sides down flush with the other wood. Basically, we just put the blade down on the base of the dresser and then pushed the wood blade into the skirt. The blade made a perfect cut, flush with the base of the dresser.
We pushed through the wood, and then brought the saw back a bit and repeated the process until the skirt was cut off. It was sooo easy and quick! In less than 10 minutes I got rid of the ugly skirt and was almost ready to put on the legs.
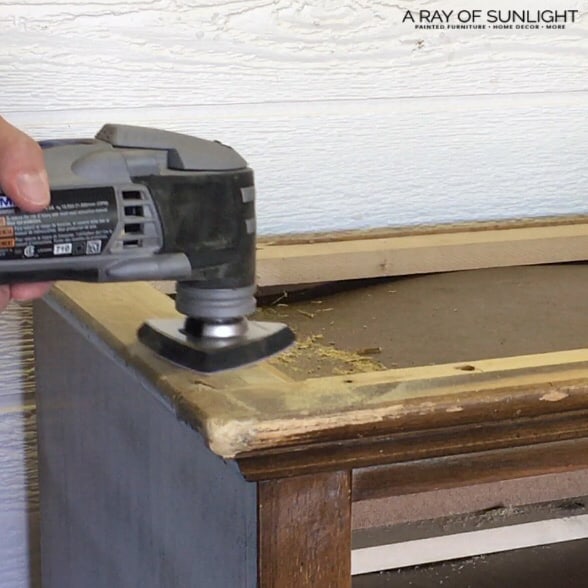
Just because I could, I went back with the sanding attachment and sanded my cut down even more smooth and flush.
Would you like to save this?
How to Add Legs to a Dresser
Notice how the back of the dresser is lower than the sides and the front still? On this dresser, I had to add a piece of wood on each side in the back just to give me a place to put the plates. But it was super easy!
We just cut a piece to fit and screwed it into the wood below. And we made sure that the screws wouldn’t be in the way of the plate too.
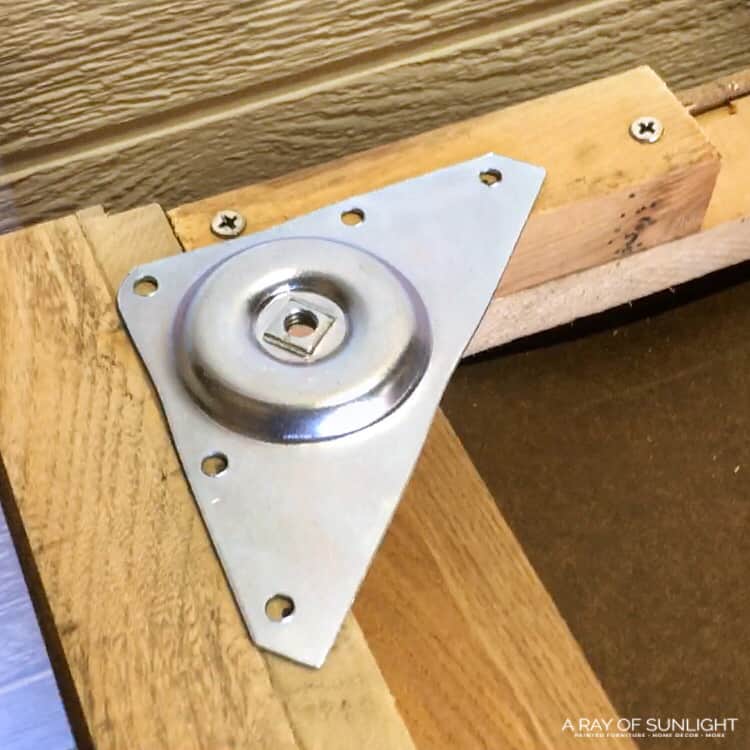
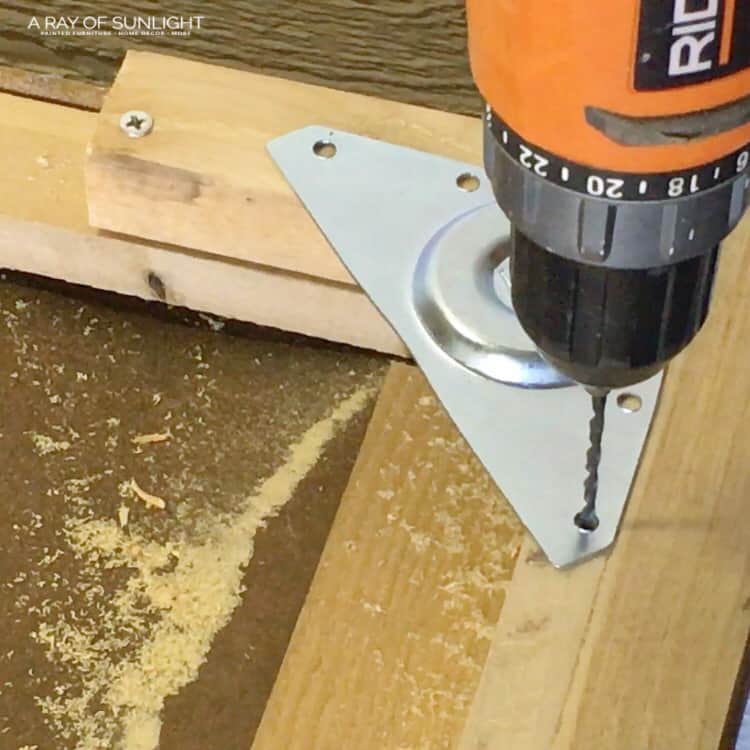
Then I grabbed the leg plates and screwed them into place. To do this I made sure the screws went into solid wood and not in a crack between wood, then I marked where the screws needed to go with a sharpie.
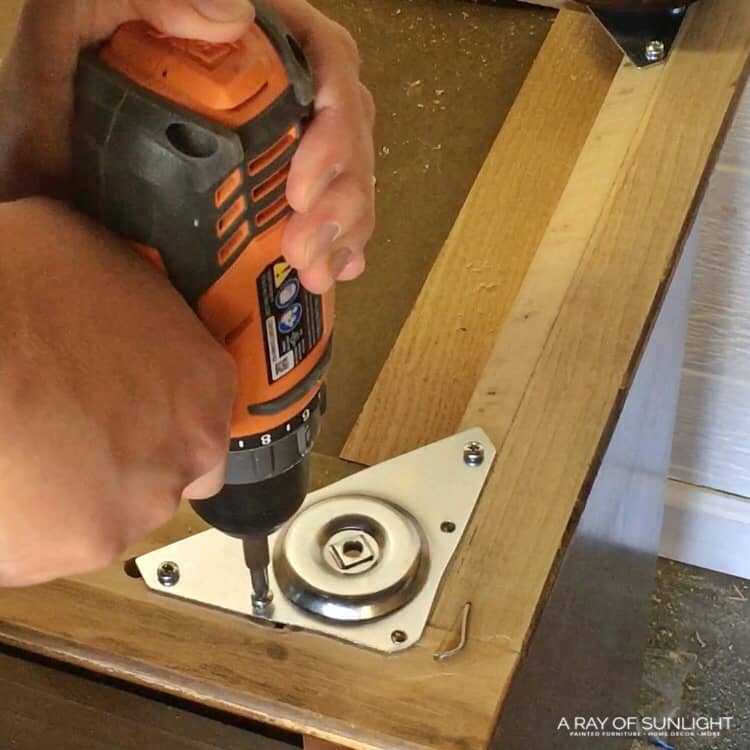
Since I didn’t want the wood to split, I drilled in little starter holes for the screws before I screwed in the actual screws. Then I put the leg plates back on and screwed them into place.
You can also use different mounting hardware like we did on this painted cedar chest makeover to get rid of that gap between the leg and base of the furniture that sometimes happens with the other methods.
Where to Buy Dresser Legs
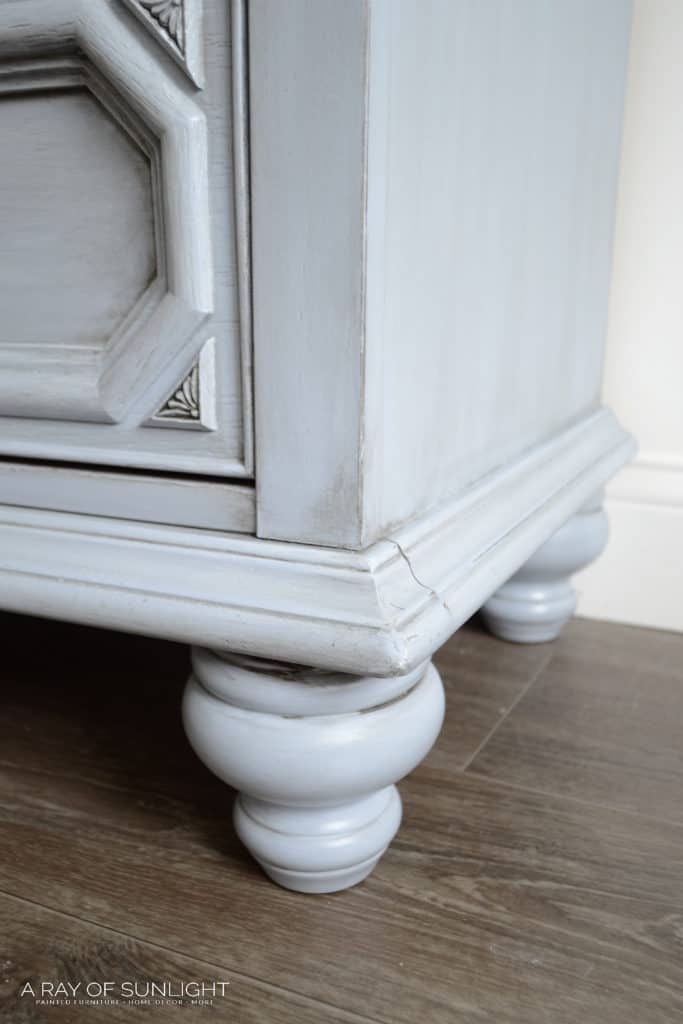
All that was left to do was to screw the legs into the plates. I got these legs off of Amazon – they have such a great selection for pretty good prices! Home Depot and Lowes also have a small selection of legs.
I love these legs though because they are taller and chunkier than you can find at other stores, and they come already stained and finished if you’re wanting to add them to an already finished piece of furniture. But there are a bunch more legs to choose from – we’ve listed all the best wood legs to add to furniture here.
And if you’re wanting to paint, just prep them like you do the furniture, and then paint! Here’s all about how to prepare furniture for painting and how to paint wooden furniture to guide you. Plus if you distress your painted finish, the stained finish will show through, exactly what you want! Check out the best distressing furniture techniques here.
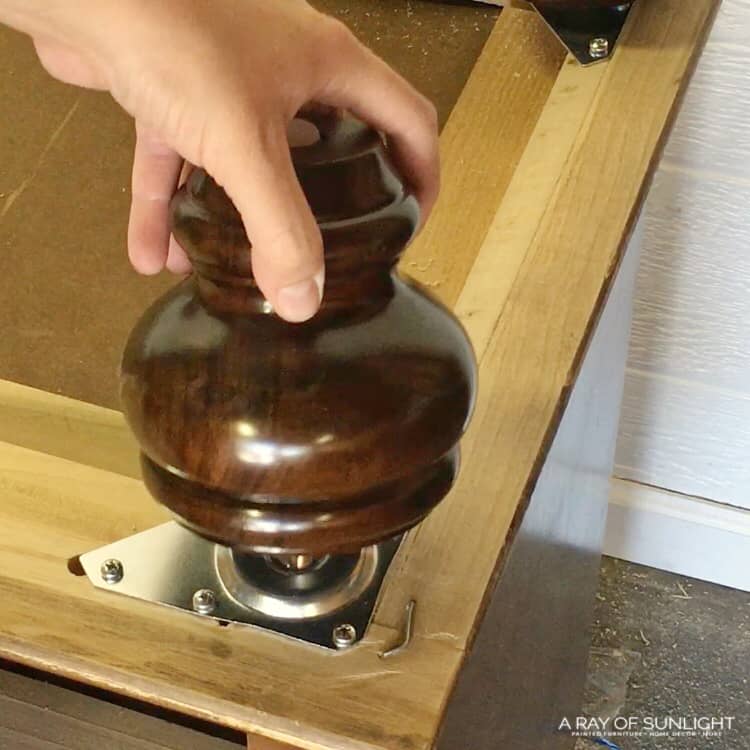
If you notice, these legs already have the screws built-in on the top. These are the kind you need.
Painting Dresser with Legs
If you’re planning on painting, I would suggest taking the legs back off the dresser before painting. Learn all about how to paint furniture with our painting furniture ideas post!
It’s really hard to get all the way around the legs when they are so low to the ground, so I stuck the screw of the legs upside down into a piece of styrofoam. I had foam insulation sitting around and it was perfect for this! You could also cut some holes into a cardboard box to screw the legs into.
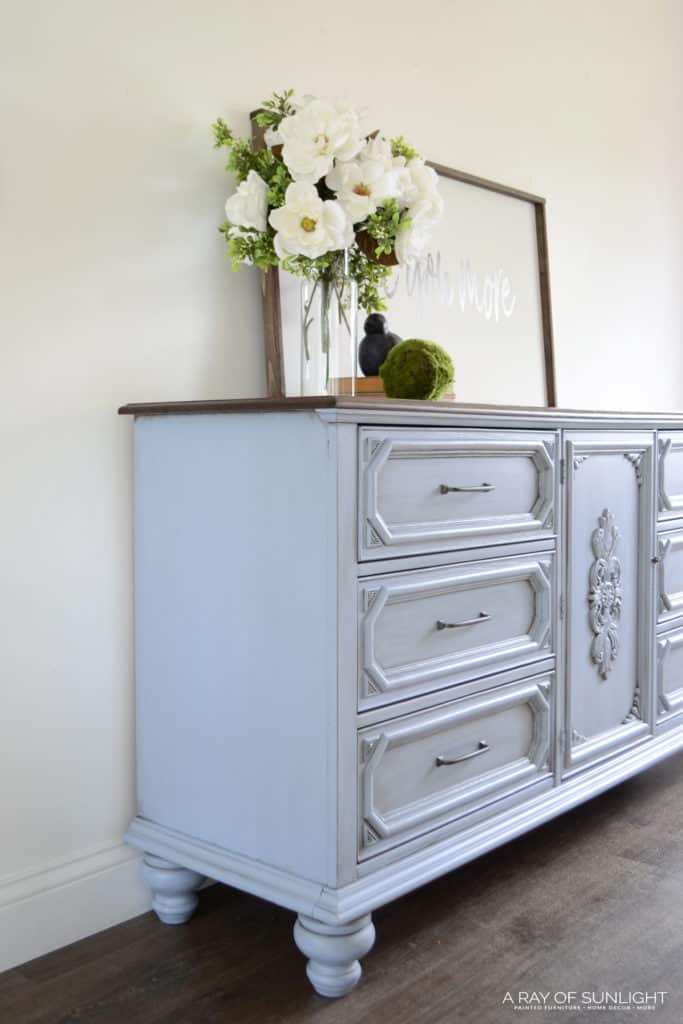
To finish off this makeover, we painted the base of the dresser in a custom mixed light blue, then glazed the details. The top was completely stripped and stained. Here’s how to stain wood darker to help you with staining. And the drawers got new hardware! Check out the full makeover of this painted light blue dresser here.
I’m still blown away by how easy it was to add legs to a piece of furniture with the Dremel Multi-Max! I really wish that I would have gotten this tool earlier because of all the things I have been able to do with it, other than the main reason I got it! So if you don’t have a multi-functional tool, run and get one!! You need this tool in your toolbox, too!
Watch the whole process in our YouTube video below:
When all was said and done, we added a little bit of extra height to the dresser, but we also got rid of the plain bottom as well. Double win! Here’s a side-by-side before legs and after adding legs! Which style do you like more?!

More Before and After Makeovers
See All >
Click any of these “before” photos below to view the “after” of that makeover.


For a similar project, check out this post on painting a chest of drawers with chalk paint. We also have a tutorial on adding legs to a cedar chest if you have this kind of piece.
How to Choose Legs for Dresser
When picking legs for your dresser or furniture, there are a few things to consider. First and foremost, you want to make sure the legs will be able to support the weight of your dresser and its contents. Look for strong, sturdy materials such as solid wood or metal.
Next, consider the style and design of your dresser. Do you want to go for a more modern look or a more traditional look? This will help you narrow down the type of legs to choose. For a modern look, sleek and simple metal or tapered wooden legs would work well. For a more traditional look, consider turned wooden legs with intricate detailing.
Another thing to keep in mind is the height and proportion of your dresser. Make sure the legs aren’t too short or too tall – you want the legs to blend seamlessly with the rest of the furniture, not stand out as an awkward addition.
Think about the color or finish of your dresser. If your dresser is already painted, you may want to choose legs that match the color or you can leave them as is for a contrasting two toned look. If your dresser is unfinished, you have the option of staining or painting the legs to match the rest of your furniture.

If you’re looking for ways on how to make a dresser taller or simply want to update its design, consider adding some legs! With all the different furniture leg options available, you can really customize the style to fit your decor and personal taste.

Adding Legs to a Dresser
Adding legs to a dresser not only adds height, it gives a modern touch to your old furniture. Learn how to EASILY add legs to dressers!
Materials
- Legs or Feet
- Furniture Leg Plates
- Paint if you decide to paint your furniture too!
Tools
Instructions
- Remove the old base or legs by unscrewing and prying off glued parts. You may need to use a multi-functional tool to cut off the base.
- Modify the base for new legs. (optional) Some dressers need extra support. Add a block of wood to make a place for the leg plates to attach.
- Attach furniture leg plates. Mark the holes on the leg plates, then drill pilot holes for the screws. Screw in the leg plates.
- Screw in the new legs. Simply thread the new leg on with the attached bolt.
- If you want to paint your dresser, prepare and clean it. Do take the legs back off the dresser before painting.
- Attach new hardware.
Notes
Some pieces of furniture may need to be slightly modified to be able to support new legs. Most pieces of furniture that I have run into have a great base to begin with once the old legs are removed.
Recommended Products
As an Amazon Associate and member of other affiliate programs, I earn from qualifying purchases.


More Furniture Legs Resources
- DIY Dresser with Hairpin Legs
- How to Add Legs to a Cabinet
- Old Trunk Makeover – Bar Station with Hairpin Legs
- How to Add Legs to a Buffet
- How to Fix a Broken Table Leg
Follow us on YouTube to get more tips for painting furniture. Or share your project with us on our Facebook Group and be part of our community. See you there!
why go and remove the original hardware? I5 looked so much better with the original hardware.
Hey Roxann!
Thanks for the feedback. If you look closely to the before photo you will notice that some of the original hardware was missing. Plus I personally like to update the hardware when I can.
Happy Painting!
Natalie
Hi Natalie!
Beautiful work. Could you do this to a larger china cabinet? Or would the piece be too heavy?
Thanks
Hey Karen!
Hmmm. I don’t know that I would try it on a tall china cabinet. The taller the item, the more potential it has to tip over. Something that tall and heavy would worry me.
Very good article. I will be dealing with some of these issues
as well..
Loved this!! Where did you get the “i love you more” sign? I’ve been looking everywhere for one!
Hey Jessica! I actually made the sign. You can click over here to see how I made them, and get a link to a very similar (free) template about halfway down the page.
Excellent post! We are linking to this great content on our site.
Keep up the great writing.
What kind of paint and glaze did you use? This is a gorgeous transformation!
The paint color was a custom mix and I used a brown glaze. I’m planning on writing a blog about it soon with more details!
Love the added feet/legs! It makes such a difference. I have a vintage dresser I am refurbishing that looks very close to this one and I want to add feet. I’m concerned with it possibly sagging in the middle as it’s a pretty heavy dresser. Did you add anything to the middle of the underside for additional support?
I didn’t add anything, but you certainly can add some support! There is usually a piece of wood in the middle that you could attach your support leg to. Or you can add a board if there isn’t one.
How long is your dresser? I’m in the process of updating a buffet and I’d like to add 4″ feet/legs and I’m trying to decide if I need centre support or not.
I think this dresser was either 5.5 feet or 6 feet long. You can always add a middle support just in case!
Any chance you still have the old handles for this dresser? I have the same one (two tone purple paint job) but one of the handles is broken and I cannot find one anywhere.
I’m sorry I don’t have them anymore.
I am a do it yourselfer also. When out and about for whatever-if I spot furniture on the curb: I always stop and check it out. I have gotten several sets of nice , quality feet for free. If I don’t need them for a project right away I still get them. All you do is unscrew them, throw them in the car, and drive away!!! I save money which is the name of the game. I then just purchase the brackets, and paint them and place on the piece of furniture.
The final piece has so much more charm with it s cute new legs!
This is so awesome! I can’t wait to get started on this credenza like piece of furniture I just picked up for my entryway. I say credenza like because i really don’t know what makes something a credenza vs a fancy dresser….but anyway it doesn’t have legs and I really want to get some put on to keep some elevation off our floor. We just had a crew over here resurfacing the wood floor and even though they were awesome and friendly, I don’t want to deal with that again for a long time haha. Thank you for sharing.