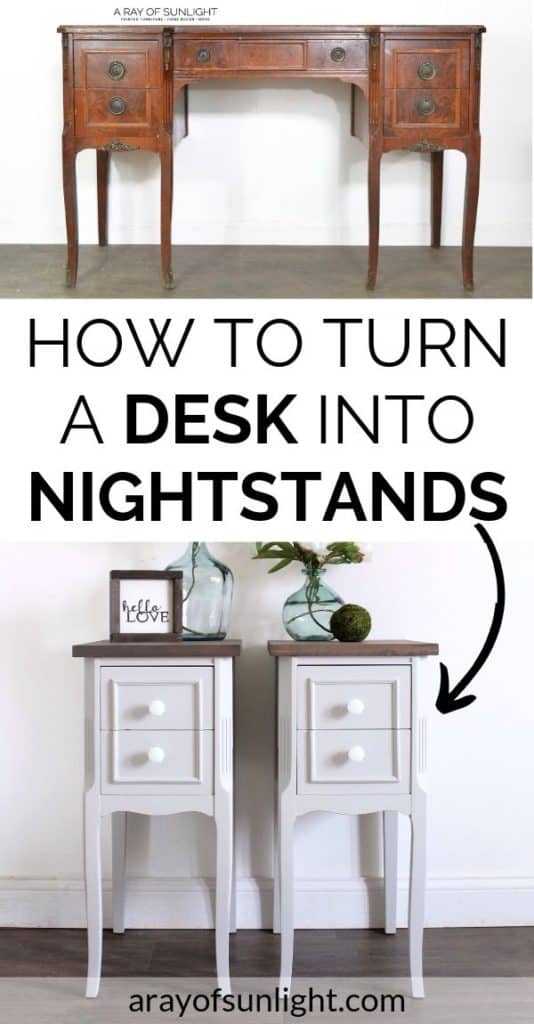
How to Upcycle a Desk into a Pair of Nightstands


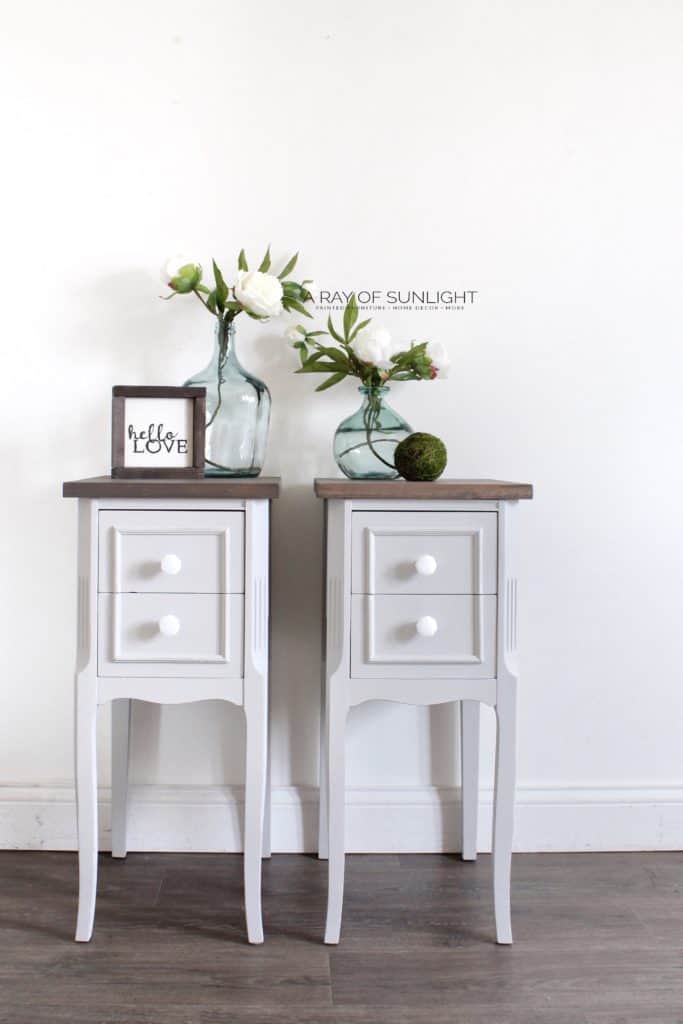
Don’t pass up old desks or vanities at thrift stores! After they are separated, they make the perfect size nightstands for a small bedroom. These nightstands are also the perfect height next to a bed! Here’s how to upcycle a desk into a pair of nightstands.
By following this painted nightstands idea, you’ll have a set of unique and stylish nightstands that will add style and life to your bedroom!
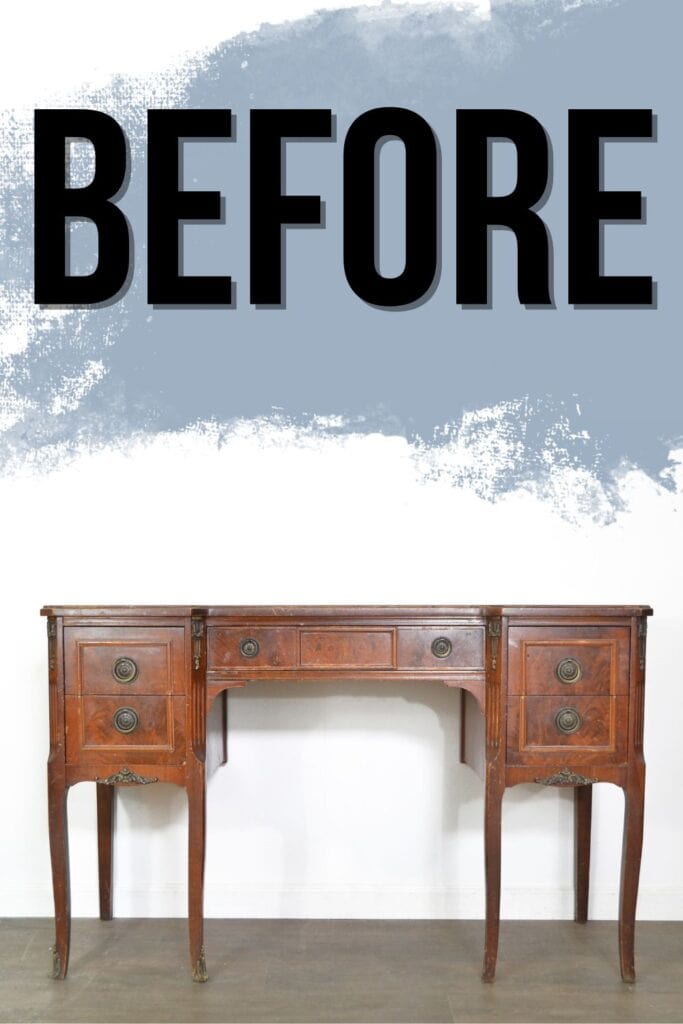
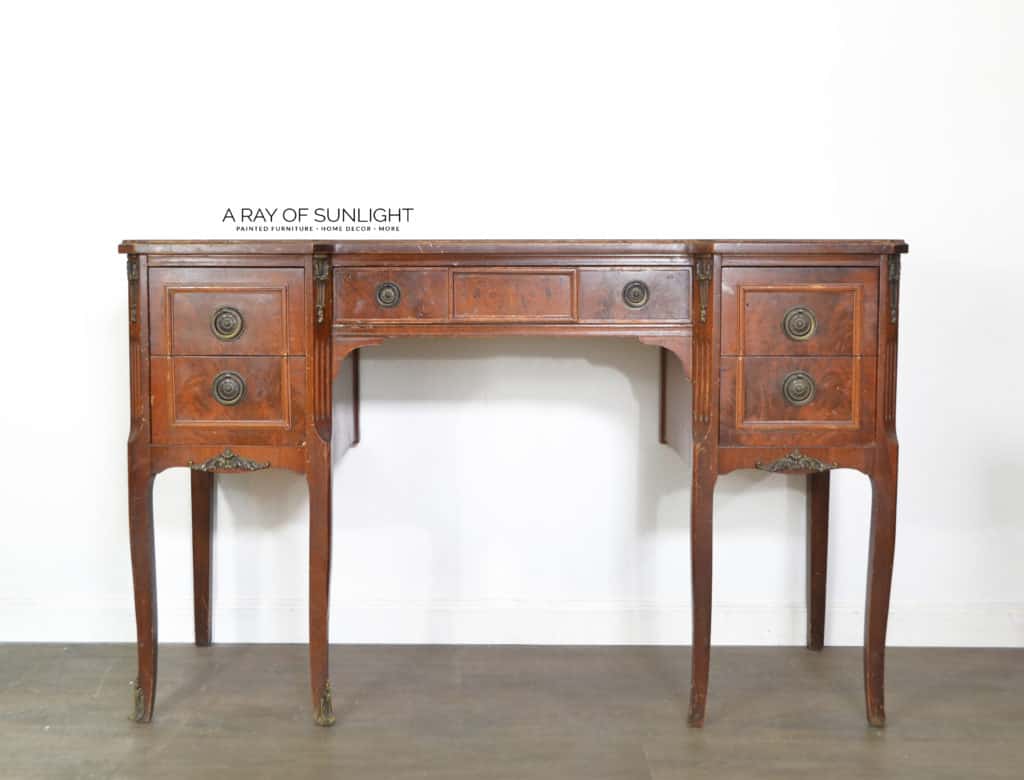
From the moment I saw this desk online, I knew that I wanted to turn it into two nightstands. I love the long legs and the simple elegant style of the desk!

The best part about this DIY project is that you can use any old or thrifted desk! You don’t need to spend a lot of money on new furniture when you can easily upcycle something from a thrift store. Plus, it’s great for the environment!
Not only is this project budget-friendly and eco-friendly, but it’s also a fun way to add your own personal touch to your bedroom.
With just a few simple steps, you can transform a plain old desk into two beautiful nightstands that will perfectly complement your space!
What to Look for in a Desk or Vanity
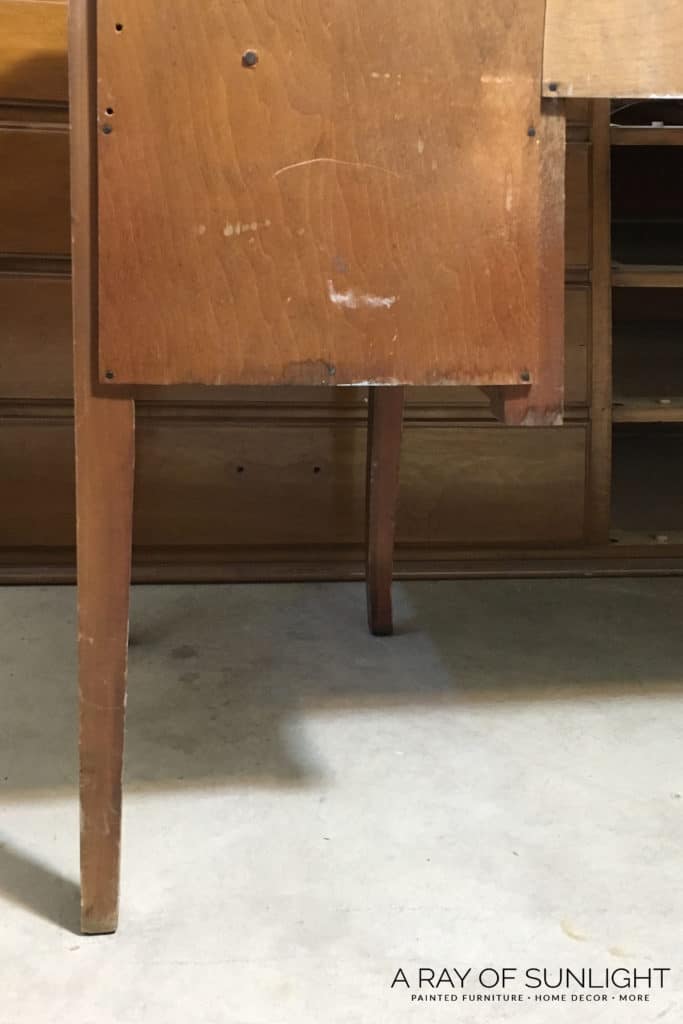
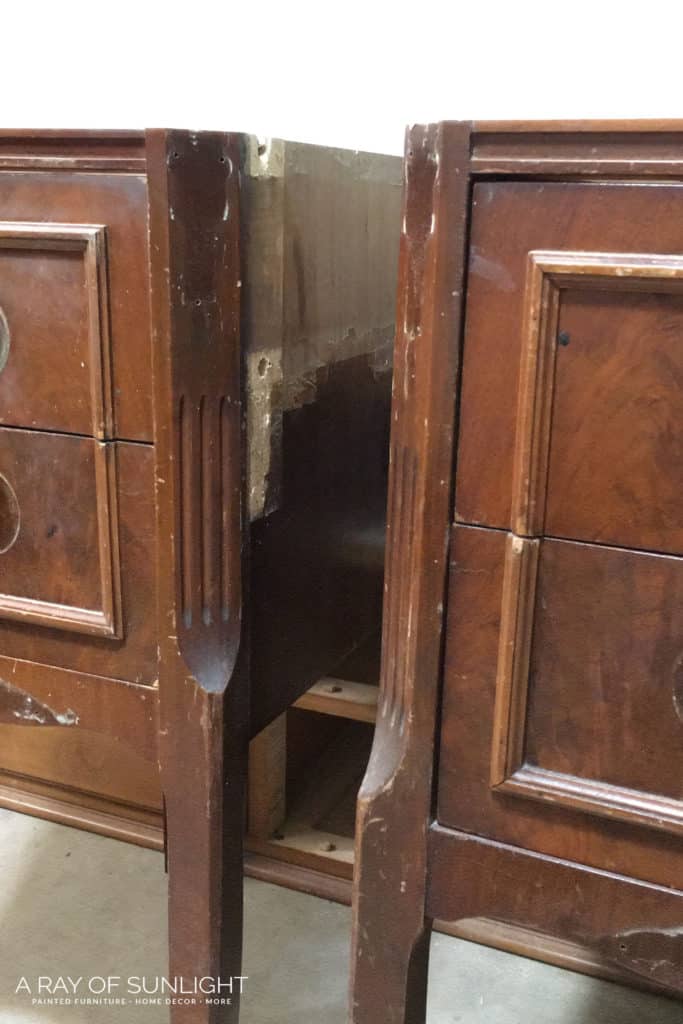
But when I went to pick it up, I found out that someone had chopped off 2 of the back legs, making it a 6 legged desk instead of 8. 🙁
With two legs missing, it wasn’t going to be as easy to DIY the desk into nightstands. But I was determined to make it happen.
**If you don’t have access to many power tools, you really need to make sure it has all 8 legs. Adding those legs back on wouldn’t have been possible without my table saw or my Dremel oscillating tool.
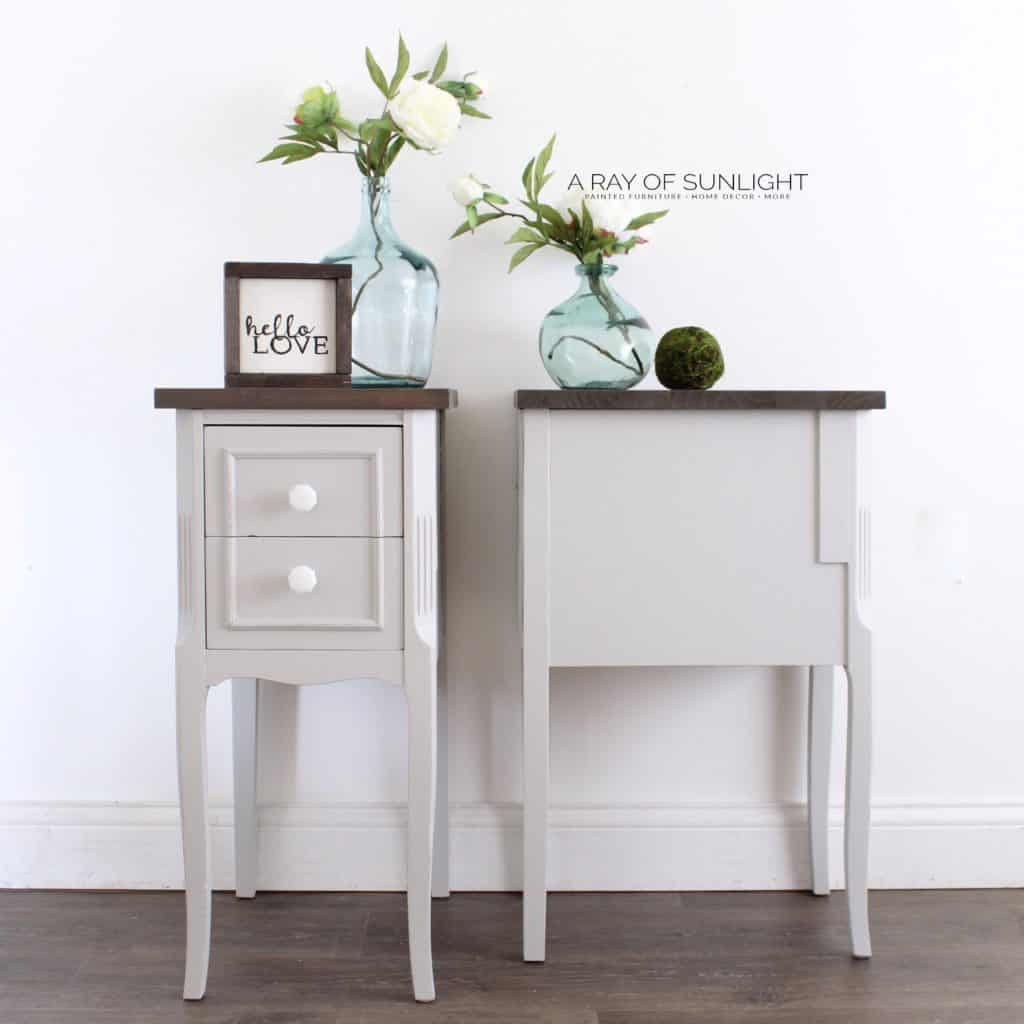
Make sure the desk or vanity has two stand-alone sides to it. When the top and middle sections are removed the sides need to be able to stand on their own. Check out more painted desk ideas here.

Supplies Used to Upcycle a Desk into a Pair of Nightstands
As an Amazon Associate, I earn from qualifying purchases. I also may earn from other qualifying purchases with other companies or get free product to review and use. All opinions are my own.
- Electric Screwdriver
- Dremel Oscillating Tool
- Bondo
- Furniture Legs
- Edge Glued Wood
- Table Saw
- Krud Kutter
- 220 Grit Sandpaper
- Clear Shellac
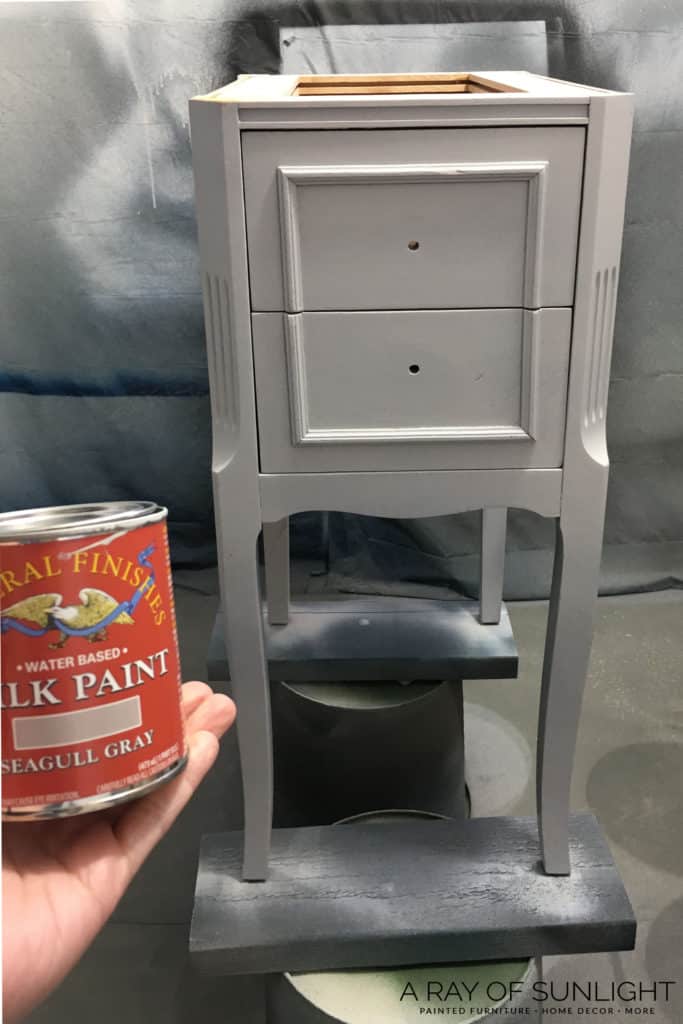
- General Finishes Milk Paint in Seagull Gray
- Paint Sprayer
- Waterbased Polyurethane
- Dark Walnut Wood Stain
- Weathered Gray Wood Stain
- Tack Cloth
- Wood Conditioner
Taking Apart a Desk or Vanity
Start by unscrewing the top from the body of the desk. This makes it easy to really see how everything comes together, and will help take the other parts apart.
The screws are usually on the inside of the piece. Once the top drawers are removed, you should see screws holding the top onto the body of the desk.
Remove the Back Paneling (optional if you’re not replacing legs)
For the screws near the back of the piece, you can either take off the back panels of the desk or you can use a tool like this that will allow you to get into tight spaces with your drill.
We needed to be able to work with the back legs, so we took off the back paneling.
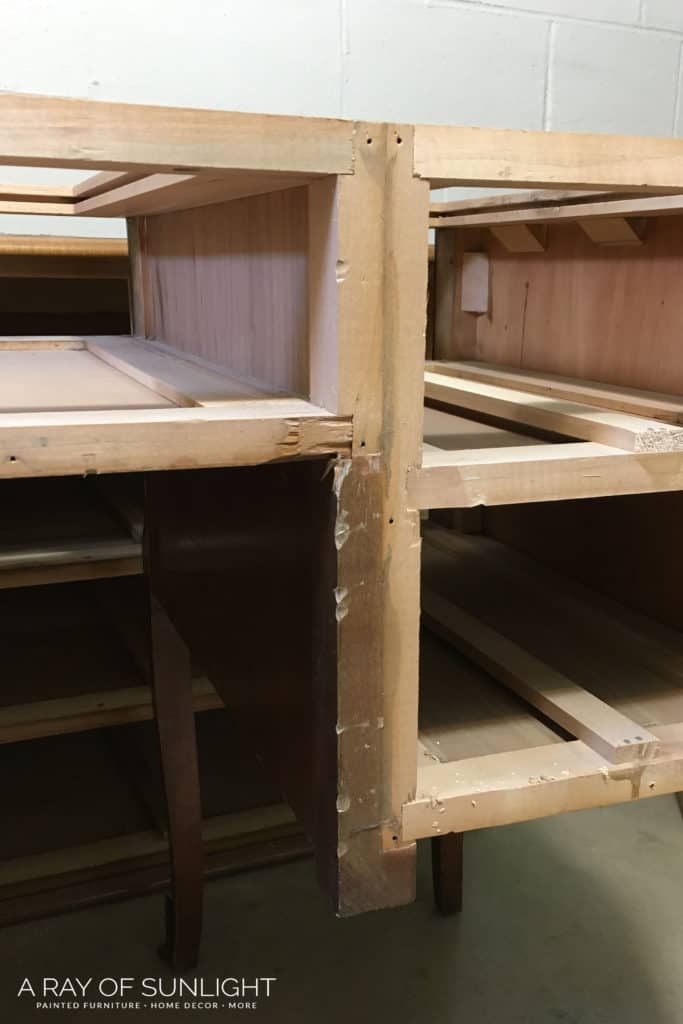
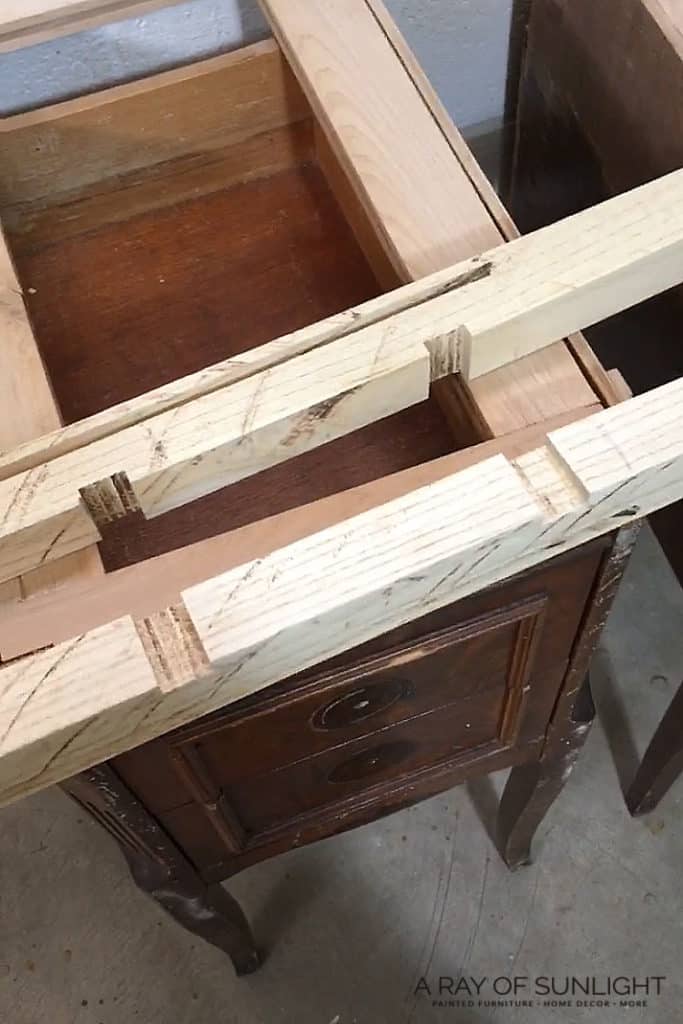
Remove the Middle Bracing
Now you can see how the middle braces are attached to the sides of the desk.
Honestly, the easiest way to get all of the middle braces detached from the sides of the desk is to use a saw of some sort. If you don’t have a small saw, sometimes a hammer can do the trick.
I really really honestly truly love this Dremel oscillating tool! It allows me to get into some really tight spaces that other saws just can’t get into, while maintaining a lot of control.
It’s harder to cut through larger areas, because the blade is so small, but it’s such a handy tool to have around for upcycling furniture.
I originally got it to help with adding legs to a dresser. Since then I have used it on just about every single furniture makeover that requires power tools.
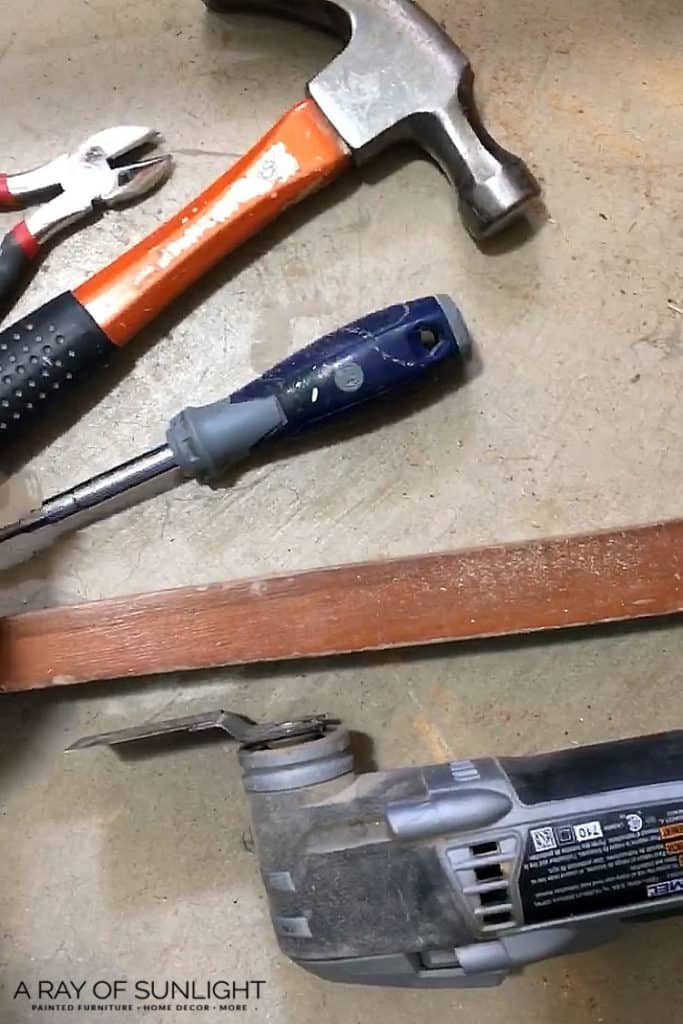
Remove the Remaining Parts of the Cut-off Legs
Next, I removed what remained of the cut-off legs. It’s really important that they come off in one piece so they can be used as a template for the new legs.
This was probably the biggest pain in the whole process because they were held on really well with nails and glue. But after a while of some patience, I got them both out in one piece.
I ended up using a hammer, flat head screwdriver, pliers, and the oscillating tool mentioned above to remove the old legs.
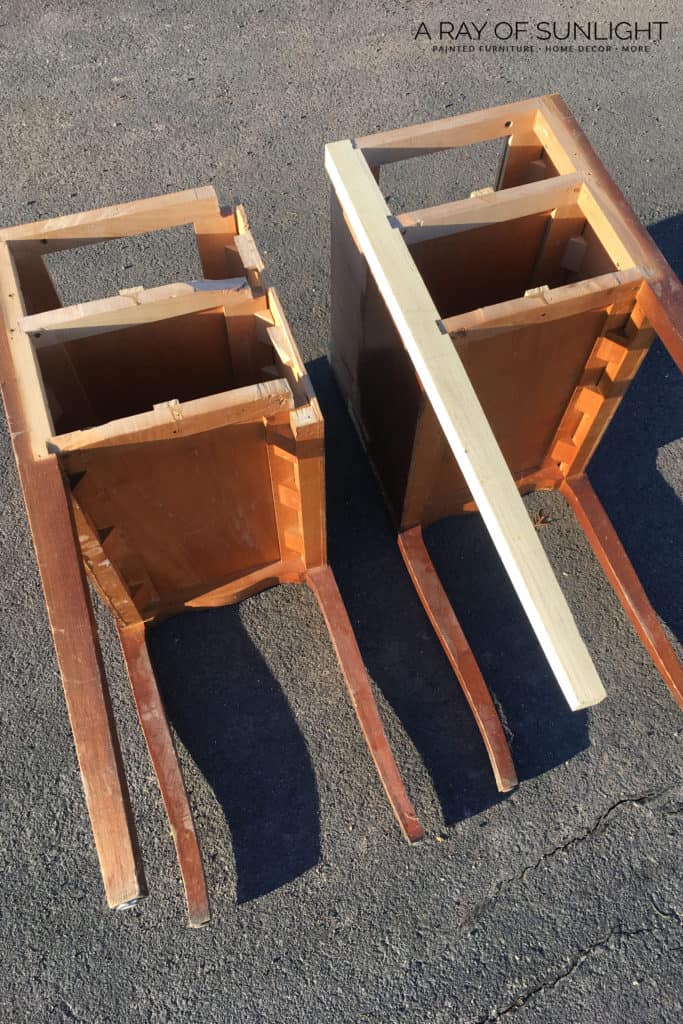
Repair Damaged Areas
Yay!! Now you’ll be left with two nightstands, and usually some holes to repair from the braces that were holding the two sides together.
Bondo works really well to repair these areas! It’s cheap, and easy to use. Here’s a great tutorial on how to use Bondo to repair damaged furniture and repair these holes.
Check out my Bondo wood filler review here to learn more.
Get Our Secrets!
Grab this super convenient How to Repair Furniture Ebook with all of our secrets on how to repair furniture for only $14.
You can print it out and have instant access whenever you come across damaged furniture, and know exactly how to fix it!
Click on the picture of the book to purchase!

Make and Attach the Missing Legs.
Remember this is only if you have a desk that doesn’t have 8 legs to begin with.
The original legs were all tapered, so I decided to look for some legs at the store instead of making my own. I specifically looked for legs that were about the same size with a slight taper.
Luckily I found these legs that had a taper, and were similar in size. They were just a little bit shorter than the legs on the desk (so I cut the other 6 legs down just a bit to match my new legs).
They were also a bit more wide and deep than I needed. But they had the taper, and I knew I could cut them down a bit on our table saw.
Using the old legs as a guide, I cut the width and depth of the new legs down to the right size. The bottom portion of the legs were tapered, so this only affected the top portion of the legs.
Then I used the old legs as a guide again to recreate the notches needed to put the new legs in place.
We used the table saw to create all the notches, then I used wood glue and my brad nail gun to secure the new legs into place.
Cut New Tops (or Cut the Old Top Into Two Pieces)
You can create the new tops a couple of different ways.
Option one: Cut the old top down to size, then router the edges to match the old detail (Like we did in this makeover on how to repurpose desks into tall skinny nightstands).
Would you like to save this?
Option two: Purchase new wood, cut it down to size and add any detail work you would like.
For this nightstand makeover, we decided to go with option two, mostly because of the routered detail on the old top.
I have access to a router, and a good set of bits. But I wasn’t sure that I was going to be able to match the old detailing the same. I also wanted something a little more rustic.
So I purchased a new piece of edge glued wood, and I cut it down to size with my table saw.
If you’re looking for another way to transform your furniture, adding legs to a piece like a cedar chest can be a great option.
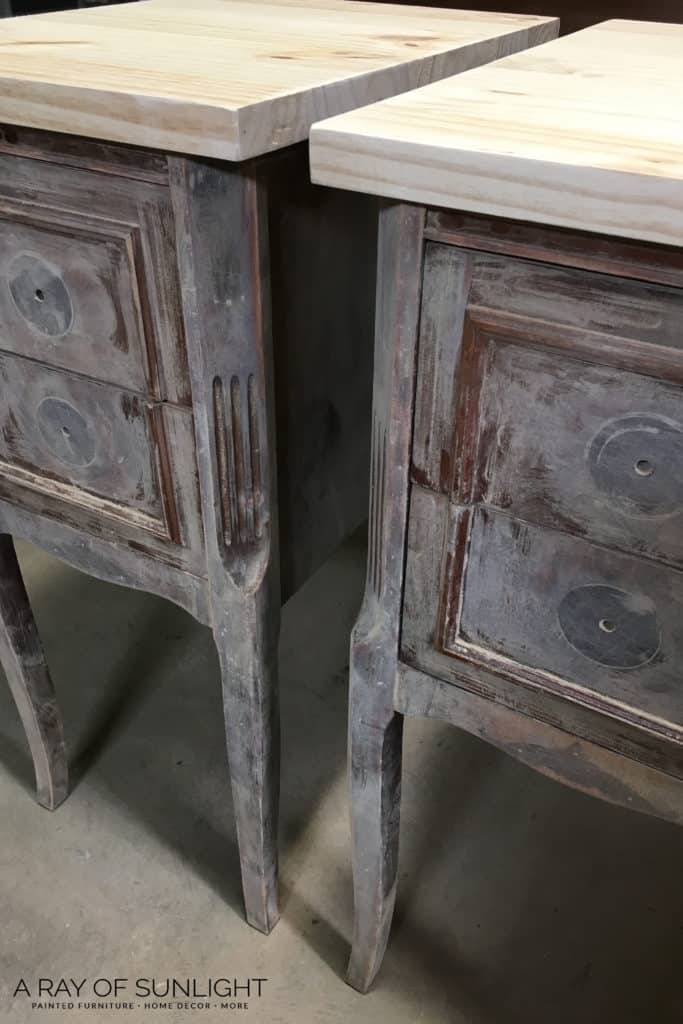
Paint the body of the nightstands
With the new legs on, and new tops cut, it’s finally time for some paint.
Start by prepping the nightstands for paint by cleaning them really well with Krud Kutter, giving them a good scuff sand with 220 grit sandpaper, and priming them against bleed through with multiple coats of shellac.
After the primer dried overnight, I painted the DIY nightstands in General Finishes Seagull Gray. If you want to go for another color or want to see how different paint colors look when used on desks, check out these desk paint color ideas.
I used my paint sprayer for a true brush-free finish. But this paint can also be brushed on and has really good leveling properties. Learn more about how to paint furniture without brush marks here!
I would recommend a high-quality paint brush like a Zibra paint brush, that won’t break the bank. Zibra paint brushes also come in different styles, like the round brush and the triangle brush that really do help get paint into details! I highly recommend them!
Learn more about the best paint brushes for painting furniture here!
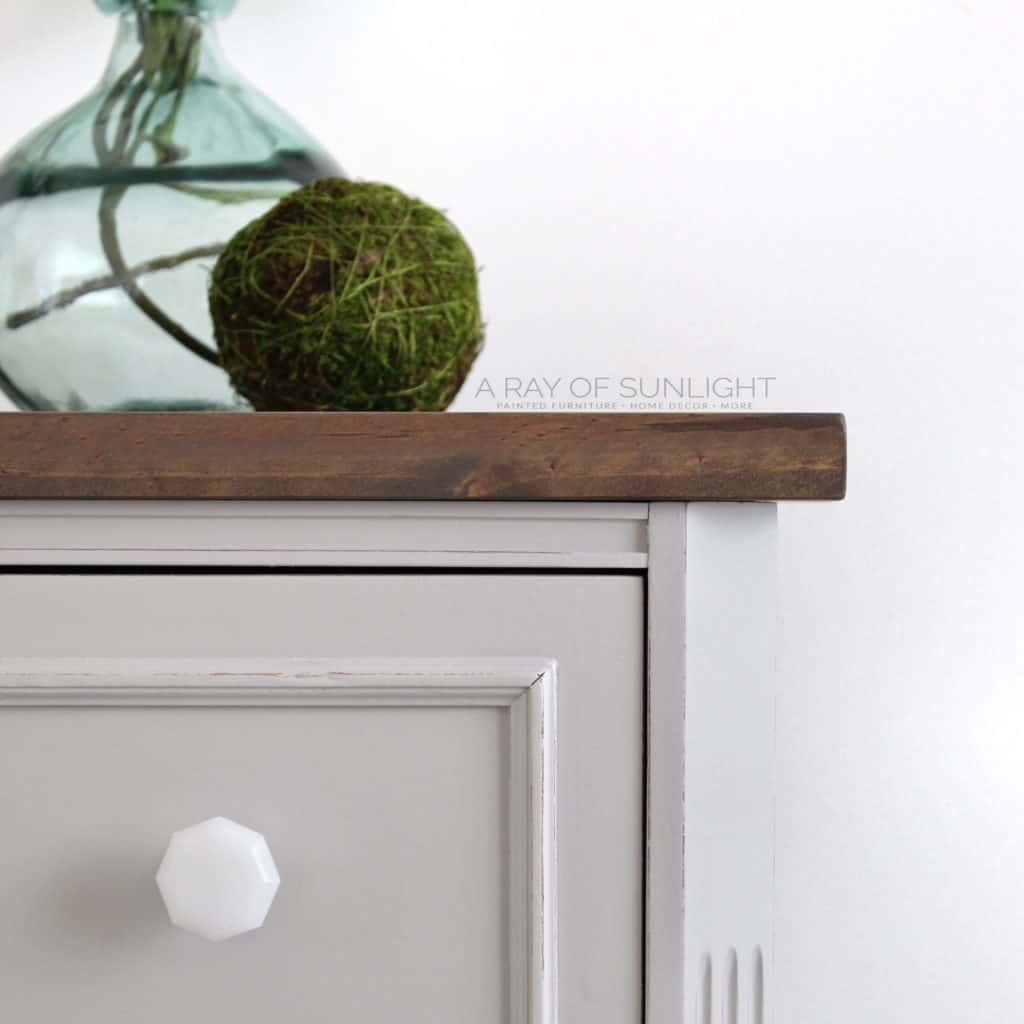
I lightly sanded the paint smooth in between each coat. Then I lightly distressed all the edges with 220 grit sandpaper after the last coat.
Then I sealed the milk paint with my favorite water-based poly for added protection. Learn ALL of my tips and tricks on how to spray polyurethane here!

Stain the New Tops
While the paint dried, I mixed up some dark walnut and weathered gray wood stain. I honestly didn’t measure, but it was probably around a 1:1 ratio.
You can also check out this homemade stain for weathered wood look.
Before staining the new tops, it’s best to sand them down really smooth with 220 grit sandpaper (always remember to sand with the grain and not against it, or you’ll end up with scratches in your stain.)
Once the wood is smooth, wipe off any dust with a tack cloth (tack cloths don’t leave lint behind, and they pick up dust really well), and then apply a generous coat of wood conditioner.
Wood conditioner helps the wood take stain evenly. Without wood conditioner, your stained wood might come out splotchy.
Give the wood conditioner a few minutes to soak in, then wipe off any excess. Then stain as usual. Then set them out to dry for a day or two.
After the stain is completely dry (give it at least 72 hours to dry if you use the water-based poly), you can seal and protect the wood for extra durability.
Attach the new tops
Attaching the new tops is easy! Simply reverse the steps you took when you took off the old top!
The easiest way to screw in the new top is to lay a towel down on the floor, then lay the top on the towel (upside down), and then line the nightstand upside down on the top.
After lining everything up, I like to have someone put their weight on the nightstand to help keep it from moving. Then I use a drill to screw the old screws into the new top.
Yay, we’re done!!! Check out more French painted furniture ideas here. If you want more nightstand makeover inspiration, check out these unique nightstand ideas and tall nightstand ideas!
More Before and After Makeovers
See All >
Click any of these “before” photos below to view the “after” of that makeover.


There’s a lot going on in a makeover like this, but it’s pretty manageable when you break it down into steps! Happy painting!
If you like how this project turned out, you should check out more shabby chic painted furniture here. If you just want to update your desk, here are chalk painted desk ideas for inspiration.


Upcycling: Giving Old Furniture a Second Chance
Furniture upcycling is all about giving old and unwanted furniture a second chance.
Instead of throwing it away or leaving it to collect dust in your garage, you can transform it into something new and beautiful! It’s a great way to save money and add unique pieces to your home decor.
Don’t be afraid to get creative with your furniture upcycling projects. This makeover is an example of how you can take a dated nightstand and turn it into a stylish and functional piece for your home. For more painted nightstand makeovers like this, check out these modern nightstand ideas!
More Upcycling Furniture Ideas
If you’ve been inspired by this nightstand makeover, there are plenty of other furniture upcycling ideas out there!
One popular trend is turning old dressers into kitchen islands. This adds extra storage and counter space to your kitchen!
You can paint it a fun color, add new hardware, and even install shelves or hooks for additional functionality. Another fun idea is using old doors as tabletops for coffee tables or desks. Simply add legs or repurpose an old table base, and you have a unique piece of furniture that adds character to any room.
For more repurposed nightstand makeovers, check out these DIY repurposed nightstand ideas and dresser as nightstand ideas! We have more upcycled old dresser ideas and repurpose tall dresser ideas you can check out and try here!
Furniture upcycling is such an exciting and creative way to revamp your home! You can also involve your family and friends in these projects for a fun bonding experience. So next time you come across a piece of furniture that needs some love, don’t hesitate to give it a second chance!


How to Upcycle a Desk into a Pair of Nightstands
Don't pass up old desks or vanities at thrift stores! Here's how to upcycle a desk into a pair of nightstands.
Materials
Instructions
- Take the vanity desk apart by removing the back paneling, middle bracing and remaining parts of the legs.
- Now, repair the damage from taking the desk apart. Fill in some holes from the braces that were holding the two sides together.
- Make and attach the missing legs. (Only if your desk or vanity doesn't have 8 legs) Use the old legs as a guide to cut the width and depth of the new legs down to the right size and to recreate the notches needed to put the new legs in place.
- Cut new tops (or cut the old top into two pieces).
- Clean the nightstands, scuff sand, and prime to prep for paint. Leave the primer to dry overnight.
- Paint the body of the nightstands and lightly sand the paint smooth in between each coat. You can lightly distress all the edges after the last coat. Then seal the painted nightstands with waterbased poly.
- For staining the new tops, mix a 1:1 ratio of dark walnut and weathered gray wood stain. Sand the tops down really smooth and do sand with the grain and not against it. Once the wood is smooth, wipe off any dust with a tack cloth then apply a generous coat of wood conditioner onto the tops.
- Now stain the tops then set them out to dry for a day or two. After the stain completely dries, seal and protect the tops for extra durability.
- Screw in your new tops to the rest of your nightstands!
Recommended Products
As an Amazon Associate and member of other affiliate programs, I earn from qualifying purchases.


More nightstands Makeovers
- Repurpose a Desk into Nightstands
- Vintage Nightstands Makeover
- Pink Painted Nightstand
- Chalk Painted Nightstand Makeover
- DIY Teal Blue Nightstands
Follow us on YouTube to get more tips for painting furniture. Or share your project with us on our Facebook Group and be part of our community. See you there!
Beautiful!! I would have gone with knobs that were a little more ornate. Great job!! I’d never have guessed those were a desk in a past life!
Thank you so much Darlene! Ornate knobs would have been a great option as well! Thank you for stopping by!!
Really a beautiful makeover…….looks like you were up to the task for such a huge project! Way to go!
Thank you so very much Tina!
They are gorgeous! I like that you left the tops wood, and I like the plainer knobs…they keep the focus on the total look. Have to admit that I would probably have just kept the desk form. You have vision! Thanks for sharing.
Thank you so much for the kind words!
This is super helpful! Thank you!
You say that you lightly sanded the paint in between coats. What grit sandpaper do you use for that?
And how many coats of poly did you apply to the paint at the end to seal it? Do you sand in between those coats too?
New to the DIY Painting furniture game. ?
Thank you!
Hey!
I use 220 grit between coats of paint and 400 between coats of poly (except I don’t sand right before the last coat of poly). And I apply 3 coats of poly to all my furniture. Hope that helps! Best of luck!
Best of luck with the move and with everything that comes with it!
Really great repurpose project!
Thank you so much Lynna!